
EPP Modern Tumbling Blocks
There has been a request to have a Block Lotto using the English Paper Piecing technique.
A common shape for EPP is the ever-present hexagon. EPP is a great way to hand-piece hexagons and other shapes that present challenges to machine piecing, either because of the small size of the units, or because of the difficult Y-seams. Next month we will try a block using machine-stitched Y-seams, but this month let’s try hand-stitched EPP.
Instead of connecting multiple hexagons together into a traditional flower pattern, we are going to create a small hexagon block out of three 60-degree diamond units. By using three different colors (a light, a medium, and a dark) the hexagon will have the appearance of a 3D cube.
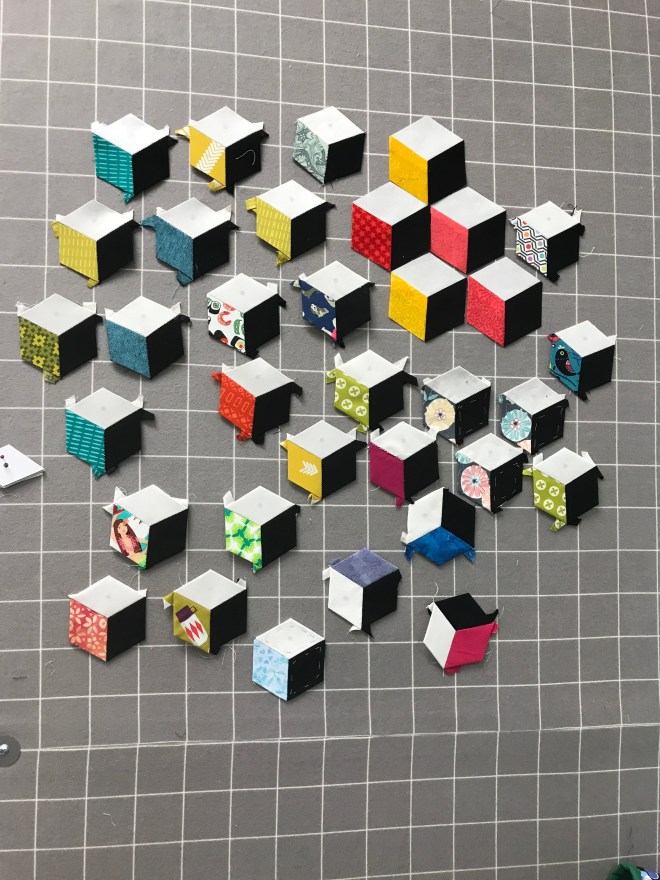
When multiple cube-hexes are pieced together, the overall pattern creates the optical illusion of never-ending stair steps. Whether the cubes are right-side-up or up-side-down, whether the steps are ascending or descending, depends only on the viewer’s perception, and can switch in an eye-blink, thus giving this pattern its name: Tumbling Blocks.
We will create a three-inch hexagon out of three 1.75” diamond units.
For each block purchased, the Guild will provide:
- 3 diamond paper templates
- a scrap of White Kona
- a scrap of black Kona
Participants will supply:
- 1 mid-tone print scrap from their stash
IMPORTANT!
In order for the 3D illusion to persist throughout the quilt, each participant must arrange the light, dark, and mid-tone diamonds in the same placement!
When the hex is oriented as shown above (point up),
THE WHITE PIECE IS ON TOP
THE BLACK PIECE IS ON THE RIGHT
THE MID-TONE PRINT IS ON THE LEFT
Three tumbling blocks together give the illusion of three right-side-up cubes.
TIPS:
1 To find out if your print is a suitable middle tone, lie it out in between the black and white scraps and squint your eyes. If the print blends in or is hard to distinguish from either the black or the white pieces, then it may be too light or too dark. In the sample above, the bird print is nearly too dark, and the geometric print is almost too light. However, as we can see, the 3D effect is still working. These prints pass the test, but any lighter or darker, and the illusion would be spoiled.
2. After auditioning a LOT of scraps from my stash, I discovered that the prints that coordinate best with black and white, are prints that contain black and/or white within them. In order for the end result to be a well-coordinated quilt, try to choose modern graphic prints with at least a little black or white in them. This is just a suggestion! The most important thing is to have fun and choose something you like!
EPP INSTRUCTIONS
There are as many ways to do English Paper Piecing as there are quilters. Having never tried it before, I used a combination of web tutorials and books to teach me. I share my method here, but please experiment and chose what works for you.
Basting
- Lay your paper templates on the wrong side of the fabric scraps. Trim the fabric to about ⅜” around the paper. It’s not important for the seam allowance to be perfect. You may choose to use a glue stick or paper clips to hold paper onto the fabric. The paper will be removed later, so if you use glue stick, please use just a dab.
- Fold one side of fabric around the paper template and finger press to a crisp line.
- Do the same on an adjacent side, tucking the corner.
- With a hand needle and thread (knotted at the tail), take a stitch in the seam allowance, biting through all layers of fabric at the corner. These stitches do not need to be pretty or even.
- Stitch once more through the same layers, at the same spot. This is a tacking stitch. Fold the next side around the paper, finger press, and tack stitch the next corner.
- Continue until all corners have been secured. Take a last tack stitch where you started, feed the thread through to the back of the seam allowance, and cut the thread, leaving a short tail.
- Baste all remaining units. It is not necessary to trim the little flags on the corners.
Joining
10. Make sure your diamond units are in the correct positions! White on Top, Black on the Right.
11. Hold two units with right sides together, with their edges aligning a closely as possible.
12. With a hand needle and thread (knotted at the tail), whip stitch along one edge of the two units, biting just enough fabric to grab. There is not much fabric excess beyond the edge of the paper template inside, so you can only stitch into a couple threads worth of fabric, which is perfect. Make your stitches about 1/16” apart. Do not sew through the paper! Take special care to secure the corners with an extra stitch, and stitch a knot when you come to the corner. Feed thread through to the back of the seam allowance, and cut the thread, leaving a short tail.
13. Open the two pieces like a book, and insert the third diamond unit into place.
14. Hold the last diamond with its right side flat against the right side of an adjacent unit.
15. Stitch along the edge as before.
16. Open like a book, and align the last two unsewn edges.
17. You may have to pinch or gently bend the paper to get the last two pieces to lie with right sides together.
18. Sew along the last edge, and your block is complete. Give it a quick press with the iron to set the folds and make the edges nice and crisp. Use caution if you have used glue for basting! Make sure it can be ironed without discoloring the fabric!

You must be logged in to post a comment.